How to beautifully tie a bow from a decorative ribbon. How to make a ribbon bow with your own hands? How to make a bow from ribbon - stylish “Dior”
Today, bows are becoming an ideal decoration for the holiday table. However, it remains unchanged appearance, when you need something individual for your hair. This accessory is also used to decorate gifts. Every girl has various tricks up her sleeve to make the holiday more festive and look more elegant at the same time.
If you have a question about how to do beautiful bow ik with your own hands, then if you have the little arsenal tricks of the housewife, this is quite easy to implement.

Paper or ribbon bow
You can make similar decorations different ways, you just need to be smart. They are realized using all kinds of materials, but the most popular are paper and tape.


Technology or how to make a paper bow for a gift:
- cut thick paper into strips;
- every piece must be different lengths;
- fold the segments without distorting them;
- it is necessary to make six large “eights”, three small ones;
- leave one figure, straight, as it will serve as a border ribbon for the “eights”;
- Each resulting figure is crossed, and in the middle the straight mold left for the border is secured with glue.

To understand the process of the action algorithm, there are photos of ready-made bows and at the implementation stage.

There is another option for creating a similar decoration:
- Various shapes are cut out of colored paper;
- drawings will be an additional touch;
- is implemented according to the previous principle, only by immediately gluing them together and tying them with a straight strip;
- At the bottom of the bow you can cut out paper in the shape of a triangle.

Tape technology
If you need a volumetric one, lush bow ik for a gift, then you can use the following instructions:
- the material used will be a fairly dense tape;
- then it is folded into several rings to create the desired size and volume;
- the loops are smoothed out;
- corners are cut off;
- straighten, then roll into rectangles in the center;
- the middle is fastened with another tape, stapler, wire;
- after this, the loops need to be turned on different sides;
- adjust the rings.


Classic decor ideas
You can also use traditional decorations for gifts:
Butterfly. The ribbon is divided into equal halves and crossed with each other. The loops alternately go down and then up. Then you need to pull the decoration together in the middle.

Strict. Two ribbons are cut, smaller and larger. The long one is used as the main blank itself; its edges are dipped in glue and both sides are glued together. The other is wrapped around the middle, at the gluing site.

A simple ribbon bow can be made with two crossed figure eights. These figures are held together. The highlight can be various beads. Simple decorations are created from thin ribbons.

Multilayer. This type is carried out with three ribbons of different lengths and widths. If desired, they can differ in tone palette. The widest one will be at the bottom, and the narrowest one at the top. The ends are trimmed with a corner and left stretched so that the product can be attached to the packaging. Another piece will be needed to tie the three layers together.


Double layer. To do this, you will need two segments: one wide, the other narrow. They are also connected with a ribbon in the middle. The tips of the primary figures are fastened to each other.


Lush compositions
Mostly chic, voluminous bows are made to decorate the appearance. Not so long ago, hair decor was in fashion, and most girls today are wondering how to properly make a bow for their heads.

A lush composition is made as follows:
- the length and width of the material are chosen based on the final intended result;
- a two-meter tape is folded like an accordion;
- in the middle the accessory is tied with a nylon thread, the ends are torn off so that it is convenient to attach to the hair;
- in addition they glue decorative elements or other colors of fabric, just a different color.
- additional touches are also bandaged.

There is another way to make a lush head accessory made of fabric:
- material of two meters, cut into 20 cm;
- folded in half;
- the wrong side will turn out;
- in a folded line, it is necessary to glue the fabric;
- the product is turned inside out after the glue dries;
- the tips are folded;
- then they are stitched with thread;
- sewn to the base;
- You can decorate the accessory with beads, rhinestones, beads.

Satin, floral bow options
The technology of how to make a bow from satin ribbon:
- the material is folded several times in a figure eight;
- fixed in the middle;
- the coils are fluffy;
- the ends are trimmed or burned.


To implement the planned accessory, in any case, a certain set of tools and materials is required. In most situations, it is better to stock up on fabric more than two meters long and twenty centimeters wide.

The master class on how to make a bow with your own hands indicates a clear sequence of actions. Only tools are taken as a basis, the algorithm is always different, because there is fantasy at the head of the rules.

For example, an attribute in the form of a flower can be made like this:
- one tape is attached with the ends inward, creating loops;
- having retreated a little space, continue the same actions until it becomes magnificent;
- The base is bandaged with a thin cloth, sometimes a stapler and glue are used;
- then straighten the product.

Or it can be implemented in another way, where the sequence will be similar, but at the same time, the ribbons are cut in the area of the loops. Today, ideas and instructions on how to make a bow are often Western.

A common option is the following:
- a thin ribbon from which figure eights are made;
- some parts are fastened in two pieces;
- a base of several ribbons connected in the middle, while being straight;
- edges jagged;
- two parts are assembled, beads and rhinestones are placed on top.


There are other ways to implement the accessory. It looks especially unique and interesting on Christmas trees, on Christmas and other wonderful holidays.

Photos of DIY bows


Bows are everywhere. Mothers tie them in their daughters' hair. They serve as accessories for clothing and shoes.
Bouquets of flowers decorated with them look more impressive. Gifts, beautifully packaged and tied with an openwork ribbon, will not leave anyone indifferent. To make bows, a wide variety of materials and techniques are used, depending on the result that needs to be achieved.
How to beautifully tie a bow from a satin ribbon
Satin ribbons themselves look very beautiful, and in combination with an interesting shape they help create a bright and unique image.
Classical
The classic version of the bow has the simplest structure and does not require much experience to perform it.
Required:
- satin ribbon;
- scissors.
Figure No. 1.
Sequencing:
- Cut the ribbon to the desired length;
- Fold the strip in accordance with what is shown in Figure No. 1, point (a);
- Cross the ends of the material (b);
- Pull one end of the tape into the resulting loop (c);
- Tighten the knot and straighten the tape.

Strict
A more complex option that allows you to combine beauty with rigor is an excellent addition to the office style.
Required:
- satin ribbon (basic);
- satin ribbon (finishing);
- fabric glue;
- scissors.
Figure No. 2.
Sequencing:
- Measure the required length and cut off the appropriate part of the tape;
- Fold the strip into a circle, connecting the ends;
- Secure the place where the ends touch with glue and press the joint to the opposite side of the circle;
- Carefully, without leaving bubbles or folds, smooth the material at the connecting point;
- Using finishing tape, wrap the joint (Figure No. 2);
- Also glue the ends of the trim.

Double
The decoration is simple in execution and, at the same time, original in appearance.
Required:
- two satin ribbons different colors and different widths (but they must be harmoniously combined);
- glue;
- scissors.
Sequencing:
- Cut off parts of wide and thin ribbons so that they have the same length;
- Place a thin strip on top and along the wide one exactly in the middle, glue the ends of the two strips adjacent to each other;
- The opposite ends of the tapes are also secured with glue, forming a circle, and then press the joint to the side of the tape opposite it;
- Cut a small piece of a narrow strip and tie it across the bow, covering the connection point, tighten;
- Remove excess cross tape if necessary.

How to tie a bow around your neck beautifully
If selected correctly, a neckerchief will fit into any situation and go with any outfit. To add charm to your look, you can give this accessory the shape of a bow. The bow can be laconic and small, reminiscent of a man’s butterfly, or lush and bright, attracting attention.
For this “decor” you will need a scarf of small width and thickness. You need to roll it into a thin strip and start decorating the butterfly.
- Place the resulting “tourniquet” around the neck so that one of the hanging ends is longer;
- Cross the ends of the strip, placing the long side on top, and then pulling it through the bottom into the resulting loop;
- Shape the short side into a half-bow shape, and lower the long side over the central part of the decoration;
- Fold the long end into a second half-bow and pull the element through the loop behind the first half-bow;
- Tighten the butterfly;
- Straighten the halves of the decoration, achieving their symmetry.

Volume
This option is made with a scarf of regular width and, despite the simplicity of execution, looks extremely impressive.
- Wrap the scarf around your neck;
- Shape the ends of the accessory into loops;
- Intertwine the loops, tying them into a knot;
- Straighten the resulting bow, making it as fluffy as possible.
How to tie a bow on a dress beautifully
Bows attached to a dress can be a regular decoration, or they can draw attention to advantages or hide flaws. All these qualities will be in the hands of any lady.
You can place a figuratively tied ribbon on any part of the dress. Lush jewelry options are more suitable for tight-fitting outfits, while neat and modest ones are more suitable for looser ones.
 Depending on the placement of the ribbon, you can focus on the belt, chest (neckline), shoulders and other attractive curves of the female body. In many cases, fashionistas buy ready-made bows and attach them in the right place.
One of the options for making such an element yourself is as follows:
- Two ends of ribbons required material fold into loops and cross over each other;
- Secure the central part with a brooch or pin with decorations;
- Sew an accessory to any part of the dress where it is necessary.
Bow with one loop
A very simple, but aesthetic and timeless option. 
A bow from one loop is made as follows:
- As in classic version you need to start with two loops;
- One of the ends needs to be circled around the other and pulled ½ into the knot;
- The second end must be threaded into the knot all the way, leaving it hanging freely.
How to beautifully tie a bow on a belt
A classic bow in the waist area can be considered a universal accessory for a dress of any style:
- Fold the ends of the belt into loops;
- Cross the resulting loops;
- Pass one of the elements into the loop formed by the crossed ends;
- Carefully tighten the resulting knot and straighten the bow.

How to tie a beautiful ribbon bow on chairs
Typically, bows on chairs appear during the preparation of premises for various special events. Before fixing the decoration, it is customary to cover each chair with a cover of harmonizing colors, but this is not necessary.
In addition, the use of such an accessory implies compliance with the following rules: 
- Do not disrupt the festive concept with out-of-order flowers or inappropriate bow design;
- To add rigidity to the shape, use organza ribbons;
- Make sure that the edges of the ribbons are neatly processed and do not create an untidy impression.
As in any other case, the most commonly used bow to decorate chairs is the classic one.
If there is no cover on the chair, you can do the following:
- Fold the bow ribbon in half;
- Hang the strip on the back of the chair so that a “loop” hangs from the inner (which the person sitting touches) side of the backrest, and two tails from the other;
- Under the crossbar, thread both tails into the loop and tighten the tape a little;
- If you wish, you can stop here, or you can wrap the ends of the ribbon around the grip area (initially you need to direct them in opposite directions) and also tie the decoration.
The bow can be lowered and raised along the back, adjusting its height. It is also possible to place several of these strips side by side.

How to beautifully tie bows on September 1
So that the day of knowledge leaves behind a lot of good impressions and a charge of vigor for the next academic year, you need to properly prepare for it. Last but not least, the girls associate their preparation with a brand new uniform and beautiful white bows in their hair. There are several ways to bring this idea to life.
Method number 1: Bow from folds
This option is usually preferred by girls adolescence because it looks very cute and romantic.
Required: 
- wide nylon ribbon;
- thin elastic band (preferably to match the hair).
Step-by-step instruction:
- Using an elastic band to secure the hair is the basis;
- Tie the ribbon around the hair, distributing it so that one of the “tails” is approximately 2/3 of the total length;
- Fold the longer end three times, and tie the resulting layers with the short one;
- Straighten the fabric, making it voluminous and fluffy.
Method number 2: Four petals
Lush decoration, great for school formal events.
Required:
- long corrugated tape.
Sequencing:
- Wrap the hair pulled into a ponytail with a fabric strip and tie a knot so that the remaining ends are the same length;
- Fold the loops of the “tails” and tie them together in the form of a bow;
- Repeat the same with the remaining long ends;
- Straighten all the loops.
Method number 3: Lush flower
Exquisite DIY satin ribbon decoration: quick and easy.
Required:
- long satin ribbon;
- thread (to match the color of the ribbon);
- thin hair elastic.

Sequencing:
- Pass the thread along the middle of the ribbon;
- Move the satin along the thread as much as possible, collecting it into an “accordion”;
- Roll the resulting assembly like a snail and secure the base with a thread;
- Sew the fabric flower to the elastic.
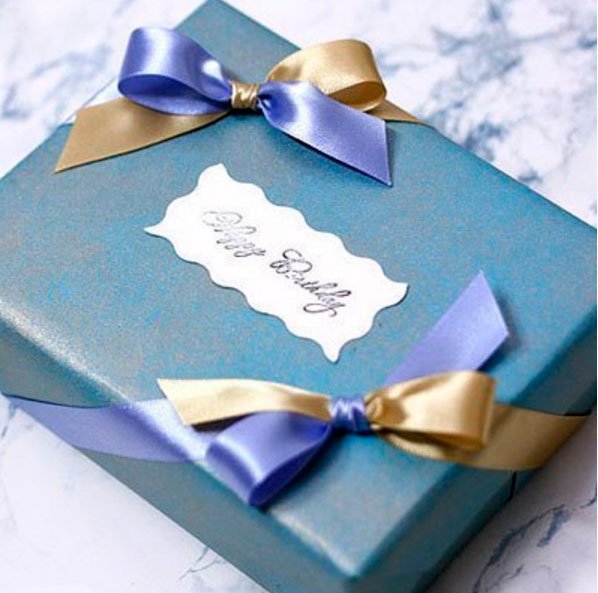
Options for a beautifully tied bow on a gift box
A gift is good and important in itself, but it makes the right impression only if it is appropriately designed. First of all, this applies to bows decorating gift box. They can take completely different forms.
Terry
Its other name is multilayer.

This is a win-win option that allows you to achieve the desired effect.
- Fold the satin ribbon several times;
- Make cuts as shown in the picture;
- Fold the satin so that the cuts are in the center of the strip, tie this point with a small piece of ribbon;
- Take out all the petals one by one (taking them out to the right, then to the left), moving from inner to outer, and fluff them well;
- If necessary, trim the edges of the bow (so as not to crumble).
Lush
This decoration is made of three ribbons of different widths and colors.

It creates a very cozy impression and is especially suitable for the Christmas and New Year holidays.
- Fold the medium-width strip of fabric 4 times so that each next layer goes exactly on top of the previous one;
- First give the widest ribbon a similar shape, and then straighten the layers so that they lie crosswise relative to each other;
- Place the first element on top of the second, and tie everything in the center with a thin ribbon.
When tying a bow, you should always consider its compatibility with surrounding objects, materials and the purpose of use. It is better to choose denser materials, since silk does not hold its shape well enough, which negatively affects the appearance.
There are two ways to tie simple bows from satin ribbons in the following video.
Are you going to visit, have chosen a gift, and now you don’t know how to wrap it? Then you are at the right place. In this article, we’ll look at how to make a bow from ribbon to decorate gifts, and we’ll also tell you how you can make an exclusive gift for every taste from an ordinary ribbon.
How to create a festive mood?
Beautifully wrapped gift with original decoration always creates festive mood, and it doesn’t matter whether you give it or someone gave such a gift to you. It is a beautiful bow, which can be called a classic decoration technique, that “warms up” the imagination, making you tremble in anticipation of a surprise. The originality of this decoration lies in its versatility, since a bow can be made from ribbons different shapes or size, and today’s market offers a wide range of colors, from plain to complex patterns. Such decorations can give the souvenir more solemnity. Initially, you need to pack the surprise in gift paper how to do this, read the article: well, we will teach you how to make a bow from a ribbon, the main thing is to be patient and not quit work after the first failure, because the wonderful grateful smile of the hero of the occasion you are going to visit deserves a little effort.
How to make a voluminous bow from ribbon to decorate a gift?

To get a truly voluminous bow, you need to give preference to cuts made of hard material. Having selected the ribbon, do the following:
- Having decided on the size of the bow (the longer the loops, the larger the bow), you need to make loops from the ribbon in 5-9 folds, placing them one on top of the other.
- Smooth out the resulting loops and carefully trim the edges, as shown in the photo below. You should end up with almost triangles around the edges.
- Take the loops by the middle and spread them to the sides so that the cut out parts are in the center.
- Secure the narrowest central part. You can do this:
- the same ribbon;
- sew with thread;
- fasten with a stapler;
- twist with wire.
- Straighten the resulting half-loops, give them volume and the beautiful bow is ready!

How to make a lush bow from ribbon? Video lesson
How to make a simple bow from ribbon to decorate a gift?

Do strict version Possible for a “male” present. It will look great both on the packaging and on a bottle of an expensive strong drink. And you can read more about souvenirs for the men's holiday in the article:. Let's get started:
- Cut a piece of wide ribbon of the required size, roll it up, and glue the edges with glue. It should look like a ring.
- Flatten the resulting ring.
- Hide the joint under the same, but thinner cut.
- Carefully glue the edges and the simple decoration is ready.

How to make a ribbon bow - a classic option
The classic version of the decoration is very simple to make, and at the same time creates an excellent frame for any gift.

With such a bow, a book, a box of chocolates or a service, as well as ordinary wildflowers will look great. This classic is performed according to the following steps:
- Take a long ribbon and fold it into two loops, as in the photo below. There should be one addition in each hand.
- Place the loop on the left at the back, crossing the two folds. It turns out to be a circle at the bottom.
- Pull the right loop through the formed circle and pull it off. The middle should be in the middle.
- Straighten the loops - the beautiful bow is ready! If necessary, you can cut the lower ends to the desired shape (oblique, triangle, etc.).

Video tutorial: how to tie a bow from a classic style ribbon to decorate a gift?
How to make a Dior bow from ribbon to decorate souvenirs?
The Dior bow is used not only to decorate gifts. With its help, unforgettable decors are created for parties, weddings and other celebrations. By the way, take note of the rules of behavior at the table at such celebrations. They are described in the article: .

To make such a bow, you need to follow these steps:
- Prepare four cuts of different lengths.
- Roll each of them into a circle and secure with thread or glue.
- Stack the circles incrementally one on top of the other.
- Tie the resulting structure of ribbons in the center, inserting the binding tape into the upper (smallest) circle, as in the photo below.
- Fasten the structure.

How to make a ribbon bow on a fork?
Do you believe that you can tie a beautiful bow on a fork? No? Then let's learn, we suggest trying out two options for making such a decoration.

Option No1
Let's try to solve the following equation: Ribbon + Fork = Original bow. To solve, you need to do the following:
- Cut a narrow ribbon of the desired size. For ease of use, it should be at least 18 cm.
- Conditionally divide it into long and short sides. Short side will not be used.
- Pass the long part between the 2-3 teeth of the fork you are using.
- And bring its end up between these same teeth.
- After these steps you should get a small loop. Don't tighten it yet.
- Thread the remainder of the long end through the loop inward again.
- Pull this end out and tighten the knot.
- Trim to fit long ends, singe them with matches or a lighter.

OptionNo2
To get a beautiful bow in the form of a lush flower, you need to use two different ribbons:
- thin;
- wide nylon.
Execution steps:
- Insert a narrow ribbon transversely into the center of the fork. You will need it almost at the end of the work.
- Use a wide piece of nylon to braid the teeth of the fork, as shown in the photo below.
- Use a thin ribbon to tighten the bindings and tie them.
- Remove the workpiece and straighten it.
- Scorch the edges with fire.

The decoration is delicate. It will ideally complement any souvenir intended for the fair half of humanity.
Video lesson: how to make a ribbon bow on a fork
Photo ideas for decorating gifts with bows


In contact with
Unfortunately, few people know how to properly make beautiful bows from ribbons, and only a few know how to tie a St. George’s ribbon with a bow to make it unusual, solemn and beautiful.
Little tricks are available in the arsenal of any housewife. The most popular are ribbon bows that you can use to decorate your hair, clothes, gifts, or the interior of your home or office on special days.
It’s worth learning how to make ribbon bows with your own hands.
St. George ribbon bow
The St. George Ribbon, together with the Order of the Cross of St. George, was approved in 1765 by Catherine II as the highest award for valor and courage. The ribbon had two colors and strictly 5 stripes - 3 black and 2 orange, symbolizing death and resurrection associated with St. George the Victorious, who, according to legend, died three times and was resurrected twice.
 The true purpose of the St. George ribbon these days is to resurrect those who died on the fronts of the Great Patriotic War in the memory of new generations. We are alive as long as we are remembered
 The true purpose of the St. George ribbon these days is to resurrect those who died on the fronts of the Great Patriotic War in the memory of new generations. We are alive as long as we are remembered.
Attention! Therefore, a beautifully tied St. George ribbon is not a stylish attribute, but a symbol of memory and pride for the feat of our ancestors.
6 main ways to tie a ribbon:
The simplest way to tie a St. George ribbon is to fold it into a loop, making one edge shorter than the other.
If you make a large loop with equal ends, you will get a bow. In this case, the junction of the tapes should be in the middle of the loop.
To ensure that the bow obtained using the second method is fluffy and not flat, it can be secured in the middle with an elastic band.
Another scheme is to bend the ribbon in two in the shape of a checkmark, making the ends asymmetrical.
You can fold the tape in three to make 3 identical pieces, and then pull the top edge slightly to the right.
Fold the ribbon in four and stretch the lower end to the left and the upper end to the right, forming the letter “M”.
You can tie a St. George's ribbon in different ways. It all depends on where it will be worn - near the heart, around the sleeve or on the wrist. The main thing is to treat it with respect and remember to whom we owe our freedom.
 There are different ways to tie a St. George ribbon
 Simple satin ribbon bow
If you need one and are wondering how to make it, we advise you to first decide what it is intended for. Whether it is decoration for hair, shoes, clothes, pillows, envelopes for newborns, or decoration for curtains, wedding glasses, cutlery and other things, choose the appropriate technology and material.
A bow on gift wrapping is not the same as on kitchen towel or on a dress, as well as bows for a bride’s hair or a schoolgirl’s hairpin.
Advice! Suitable materials for creating a bow are silk ribbon, satin, guipure, velvet, linen, etc.
Options for tying bows
The more interesting and more unusual material, the more beautiful the bow will be. It is important that the tape holds its shape. You can choose any color, it all depends on the imagination of the needlewoman and where the bows will be used.
Option 1:
A piece of narrow tape 20 cm long is folded in half and the resulting loop is bent down.
The resulting 2 loops are crossed, and then one is turned into a circle and tightened.
Option 2:
Use 2 pieces of 20 cm each - one for the base, the second to secure the base.
The tape for the base is crossed at the ends, leaving 3 cm on each edge.
The result is a circle, the middle of which is bent to the junction of the ribbons and basted
The second piece is used to cover the seam and tie it in a bow on the reverse side.
Option 3:
Cut 3 pieces of ribbon, different in width, length and shade, and trim the edges with corners or fold them, which will give the product volume.
On a wide and long piece of the main color, equal in size to the bow, place the lightest piece (can be colored), shorter than the first, and then another narrower and shorter piece of the main tone.
The combined sections are tied together with a narrow ribbon, carefully hiding the edges.
Option 4:
2 pieces of tape, different in color and width, but the same in length, are applied to each other, forming a circle of the same diameter.
Fix the middle with a narrower tape.
As a variation, you can tie a bow from three, four or more pieces of ribbon of the same tone or other shades, selected by color.
 The more interesting and unusual the material, the more beautiful the bow will be.
 Dior ribbon bow
This accessory will certainly decorate festive table or a gift. It is formatted according to the following scheme:
The tape of the desired width is layered in turns on top of each other, constantly reducing the size of the turns.
The topmost turn should be no more than 1–1.5 cm.
The resulting bow is secured with a narrow ribbon made of the same material as the main one, threading it under the top turn. You can choose a fastening tape that is contrasting, light or dark shade, but the texture of the material should remain the same.
 This accessory will certainly decorate a holiday table or gift.
 Ribbon bows on a fork
You can make an unusual tiny bow from a ribbon, for example, to decorate an invitation card, underwear or blouse, using an ordinary dinner fork.
To work you will need clips, scissors, a fork, narrow ribbon and thread.
The ribbon is wrapped around the fork and the ends are crossed.
The tape is secured to the outer teeth with clamps, and tied together with thread in the middle.
Trim off excess.
Wrap the ribbon around the fork so that one end is at least 3 cm.
This edge of the tape is inserted between the tines of the fork in the middle and brought up.
The long end of the ribbon is passed under the formed loop, the ends are tightened and the excess is cut off.
The resulting bow is carefully removed from the fork.
Wrap the ribbon around the fork several times.
The free part of the tape is passed under the formed right loop.
Tighten the ends and remove the bow from the fork, which in this case will not be single, but double, triple, etc., according to the number of initial turns.
The bow on the fork can be varied by adding a different color or shade.
- Place a ribbon of the main color in the form of a wave between all the cloves, leaving an initially short end.
- Using the long part of the tape like a checkerboard, repeat this technique 2-5 times and raise the resulting rows up.
- A ribbon of a different color is inserted from the bottom center of the fork and brought out at the top, while lowering all the previous rows down again. Wrap it several times and tighten the knot.
- The bow is removed from the fork, the excess ends are trimmed and straightened.
 You can make an unusual tiny bow from ribbon using a regular dinner fork.
 American style bow made of satin ribbon
When decorating such decor, the main thing is the imagination of the craftswoman, since the technique itself is based on many techniques. How to make an American bow from a ribbon according to the classic pattern:
Figure eights are created from a narrow ribbon of any texture.
They are fastened together with 2-3 pieces.
From below, if desired, you can make a base from several straight segments of the same tone or various colors, connected in the middle. To make the edges of the ribbons more attractive, you can make them patterned or curled.
Connect the base and the eights, securing a bead or a small bow on top.
For children's hairpins for an American bow, a rep ribbon is better suited.

Bows for the New Year tree
Buying Christmas tree decor, including bows, is not a problem these days. But it’s much more interesting to do it yourself, especially if you invite children to help you. Make New Year's decor can be made from paper, organza, felt, lace and ribbons.
 Bows look very beautiful on the Christmas tree
 It’s worth taking a closer look at how to make a beautiful New Year’s bow for a Christmas tree from a red ribbon, although you can use various rich shades and even ribbons with a themed pattern:
Cut the ribbon of the desired thickness into strips.
Each strip is folded in half lengthwise and stitched along the edge.
At the fold, each piece is cut at equal intervals.
Gather the thread used to stitch the edges to form a circle.
The edge is fixed, the thread is cut or a loop is formed from it, by which the bow will be hung on a branch.
Decorate the center of the bow with a bead, small bow, figurine, etc.
In addition to bows, you can decorate the Christmas tree with spiral ribbons or add them to the bow itself, for which:
A satin ribbon is wrapped around special wooden skewers and the edges are secured with pins.
Place in an oven preheated to +180ºC for 5 minutes.
After cooling, carefully remove the ribbons from the skewers and get beautiful decor with uniform bends.

Hair bows
A hairstyle decorated with ribbon bows using the kanzashi technique will not go unnoticed.
To work you will need:
satin ribbon two contrasting colors, for example, scarlet and black;
finishing tape white with black polka dots, or black with white polka dots;
hairpin, elastic band or crab;
simple white ribbon;
scissors and thread;
textile glue, candle or lighter.

The procedure for making kanzashi bows:
The first layer is formed by cutting 4 pieces of black ribbon and melting the edges with fire.
Sew the edges of each strip or glue them together to form circles.
Fold the first piece in two so that the seam is in the center. The result is a bow, the middle of which is secured with a thread that matches the tone of the main ribbon.
Do the same with all the blanks and connect them together like a flower.
Form a second layer from three pieces of scarlet ribbon and two white ones with black polka dots.
Each strip is folded in half, a corner is cut off and the cut is scorched with fire. This is done on both sides, resulting in 5 blanks with cut edges.
Make 2 seams in the center of each segment and connect all the strips with one thread, alternating them.
Carefully tighten and, wrapping the thread twice, secure the knot.
Cut pieces of white ribbon and singe the ends.
Bend each ribbon in the middle and make a loop at one edge, then sew it on or glue it. They do the same with the other edge.
Having processed all the white segments, and there are four of them, they are glued together to form a unique shape reminiscent of a butterfly.
They make another butterfly from a white ribbon, but a narrower one, which will serve as the third tier.
They cut scarlet ribbons, as well as black ones into white polka dots, and singe the edges again.
Connect 2 pairs of ribbons of different colors together with the wrong sides facing each other and glue them in the center. From the resulting blanks the same butterflies are made as from white segments. The fourth tier has been formed.
Connect all 4 tiers, laying them in layers with gluing each layer, and attach to a hairpin or elastic band with a strip of black ribbon.
The center of the kanzashi bow is decorated with a bright button or large bead.
The kanzashi technique is simple. With its help, you can easily make beautiful bows from ribbons with your own hands if you follow the instructions.

There are a lot of methods for forming bows from all kinds of ribbons, so the various variations and the final result depend solely on your desire, skill and imagination.
In needlework it is impossible to do without making amazing crafts. To make them, they use elastic bands, flowers, a large and wide satin bow, etc. Ribbon bows are something that you can easily make with your own hands. These lush school ribbons made of nylon fabric will definitely decorate the hairstyles of young fashionistas.
Ribbon bows are something you can easily make with your own hands.
Sometimes the most beautiful things are the simplest ones. A voluminous bow made of satin ribbons is very easy to make, the main thing is to follow the instructions or look at MK.
Step-by-step instruction:
- You need to prepare materials: tape, glue, wire and scissors. Even though there is no paperwork involved, the use of scissors is a must. The use of wire is not necessary.
- After selecting the ribbons, they should be cut. Thin ribbons will not make a beautiful bow hairpin. You shouldn't cut it too much; the tape should be long enough. It is recommended to make a cut “with a margin” so that, if necessary, you can adjust the shape of the product.
- Now the material needs to be placed on a flat surface and both edges should be pulled towards the middle. They overlap each other so that you get 2 loops and a tail.
- After this, the proportions of the bow need to be adjusted. It is important that at this stage the workpiece is symmetrical.
- Then the left loop is folded towards the right loop. A hole is formed in the center of the workpiece; the material must be turned out through it.
At the last stage, the bow is tightened tightly.
Gallery: new and unusual ribbon bows (25 photos)


Cute DIY ribbon bows (video)
How to make a bow from ribbons or braid using the kanzashi technique
A kanzashi bow for a girl is easy to make even for beginner crafters.
Master class step by step:
- For such work you will need not only tape, but also wire. Work begins by cutting the required amount of tape and laying it out on a flat surface.
- Then 2 loops are formed from the material. The two ends of the ribbon are folded in the middle, overlapping each other. To prevent the workpiece from falling apart, hold the center with your finger.
- After this you can use the wire. You need to wrap it around the center of the bow. This needs to be done very tightly. To camouflage the wire, wrap a thin strip of tape around the center.
- Now a similar preparation is being made. The sequence of actions is the same.

A kanzashi bow is easy to make even for beginner crafters
The kanzashi bow is lush. Therefore, in order to achieve such a volume, you need to put a second one on top of the first blank. The blanks are fastened with wire.
School bow made of nylon ribbons: master class
It’s unrealistic to imagine a schoolgirl going to September 1st without a bow. But why buy such a thing when you can make it yourself?
So, the scheme of work:
- The work begins with cutting nylon tape into 4 segments. Using a lighter, burn the ends of the segments.
- Take one piece of material and gather it onto a thread in the center. There is no need to make too large stitches, 0.5 cm is enough. Now the product is pulled together, forming a rosette. This will be the pinnacle of the work.
- The second piece of material is folded in half along its fold. Thread stitching is being done. The product is tightened.
- To decorate the bow, you can use, in addition to nylon, satin ribbon. It should be used to decorate the rose bow from the center, making small loops. The satin material is secured to the nylon with thread stitches.
- All ends of the tapes must be melted. At this stage, the middle part of the work is ready.
- A piece of nylon thread is folded in half, and then the part of the material that is on top falls down a little. The shape is fixed with threads. It turns out to be a bow. It needs to be sewn onto the previous workpiece. The double bow for school is ready.

How to make a beautiful little bow from narrow satin ribbons?
Small bows are convenient to use as hairpins.
The work includes the following stages:
- To make such work you will need not only tape, but also fabric. It should be thin enough. The color of the fabric is delicate, bed-like, for example, light pink or beige.
- You need to think about how the bow will be fixed to the hair. For these purposes, you can use a hairpin.
- The ribbon is placed on a flat surface. It is necessary to form a standard bow in the form of a butterfly from it. To do this, the ends of the material are folded inward.
- In the middle, the work must be tied with wire or thread. To disguise the fastening, you need to cut a thin strip of the same material and tie it around the center of the butterfly.

Small bows are convenient to use as hairpins
The last step is to attach the butterfly bow to the hairpin. Now you can wear it on your hair. The beautiful decoration is ready.
How to choose a ribbon to create a bow?
- First you need to determine what the bow is for. For example, if a craftswoman wants to make it for her first-grader daughter, then preference should be given to nylon material.
- The choice in favor of a particular tape should be made based on its quality. You should not save on such material, because to make the product look beautiful and presentable, you should buy high-quality ribbons.
- Beginners are not recommended to use satin material in this work. Why? It's all about its slipperiness; it will be inconvenient for an inexperienced master to work with it.
- If a young fashionista wants to make a bow decoration for her hair, she can look for a ribbon with a pattern. This item can be made as an accessory for a dress. For example, polka dot or striped ribbons are available for sale.
- If you need a ribbon to decorate gift wrapping, then you can find a material with wire on the edges. Using this tape is very convenient. With this material gift wrap will be decorated in the best possible way.
- Don't be afraid to experiment! This rule is universal even for beginners. Don’t be afraid to use multi-colored materials, as well as materials of different quality, to create a bow. Each master is his own stylist.
- All knots that the master makes while working on creating a bow must be very tight. It is important to remember the following: if the craftswoman was able to tie a tight knot, then she can tie a bow from it by hand.
- Auxiliary materials such as wire and thread should be used when the material is not dense enough. Otherwise, there is no point in using them, since the product will fix itself perfectly.
- You should always cut the ribbon with a margin. For example, if to create a bow you need material 20 cm in length, then it costs 25 cm to cut. These seemingly extra 5 cm are necessary to adjust the shape of the product.
- If glue is used in the work, then you can move on to the next stage only when it is completely dry.
- There are times when the glue, even after drying, is visible on the material. To disguise it, you should tie the place with threads or a small piece of ribbon of the same color as the bow.
Those who have difficulty tying bows are recommended to use special devices for this. This will make the task much easier for an inexperienced master.


